
How to draw a cartoon peacock?
This quick tutorial will teach you to draw a cartoon peacock drawing in simple steps – ideal for children and novice artists. The above images represent how their finished drawing will look and the assigned steps. At the bottom, you can read interesting facts on the cartoon peacock. Also, make sure to see one of the hundreds of category grouped drawing tutorials.
Step 1:
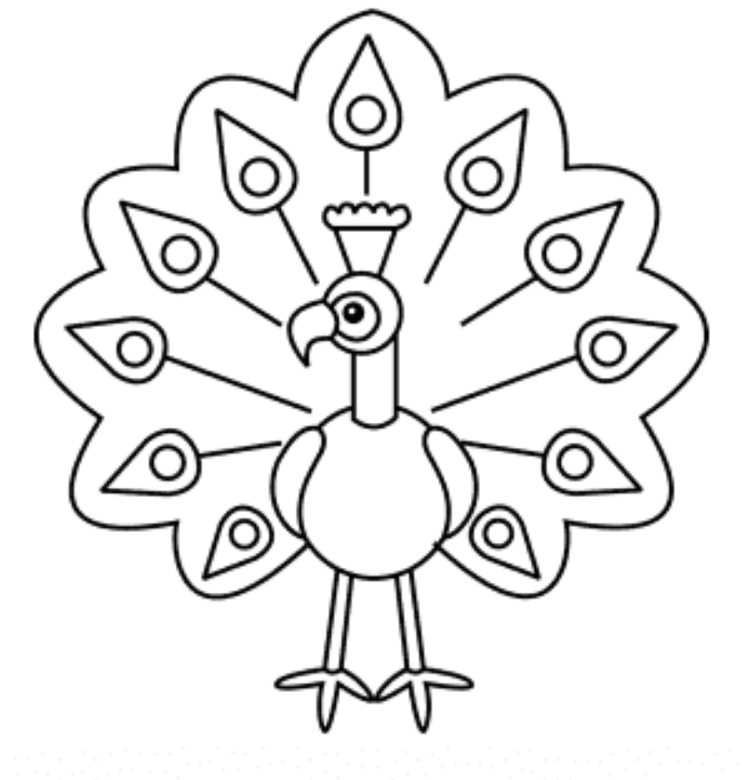
Let’s start with the peacock’s head. Start with the drawing of a semicircle, which applies to the right. On the one hand, left, continue this line. Add another vertical line for the neck of the peacock from the base of the semicircle. Well, right, add two triangles to create the swab’s top and bottom. Add two circles for the eyes to the left of the beak. Now, go to the head and add three curved lines that run-up. Add a small circle to the tip of each line.
Step 2:
Well, time for the body. Draw the left line a bit more below. Now you skip in the straight vertical line, put it as pressed, and fold it left at the base. There should be an ideal place for the wing.
Step 3:
Add to a conical figure. The upper point of the cone should turn left. Add a pair of diagonal lines inside the wing and connect them to the middle with a single vertical line.
Step 4:
Well, from the peacock base, add a pair of very close parallel lines. Add some toes from the feet at the end of these two lines. Repeat this step a little right and leave a room between each combination of leg/foot.
Step 5:
Finally, we add the magic tail of the peacock folder. Move to the left of the wing and add an indignant shape figure with many pieces at the base. Have fun with the addition of shapes and textures to the tail!
Step 6:
You did a nice job! Congratulations!
How to draw a simple peacock?

In this short drawing, you will know how to draw a peacock for children in simple steps – ideal for children and newbies artists. The above photos describe how their completed drawing will look and the allotted steps. At the bottom, you can read interesting events on the peacock for children.
Step 1:
To start the peacock, pull a circle for your head and neck. Make sure to leave a place in the circle for the beak.
Step 2:
Add a sharp spout and a small circle in a bigger circle for the eye. Add a spring on the head. This pen looks like an ice cream cone.
Step 3:
Add two lines for the body. Read the place for the wings.
Step 4:
Now add the wings. Then draw two long thin legs with lace feet.
Step 5:
To add the tail sources, pull a large wavy line around the outside of the body.
Step 6:
Draw patterns on the spring of the tail with circles, leaves of leaves, and straight lines. Excellent job, your peacock is ready!
How to draw a realistic peacock?
How to draw a realistic peacock in simple steps – ideal for children’s and newbie artists. The above photos represent how their finished drawing will look and the rationed steps. At the bottom, you can read interesting facts about the realistic peacock. Also, create certain to see one of the thousands of grouped drawing tutorials.
Step 1:
Start with your head. It’s a small circle.
Step 2:
Now add the neck by pulling a long-form vertical sausage.
Step 3:
Draw a small triangle on the side of the circle to make the beak
Step 4:
Add a small point on the face for the eye.
Step 5:
Draw now the Bladon. Add a small hair triangle on the head.
Step 6:
Then draw feathers coming out of the neck to make a wing.
Step 7:
Drag a curve to the wing for the body and add it.
Step 8:
Now in the tail. Draw a large form of pear and add the detail loads of the spring.
Step 9:
Finally, add two thin legs.
Also Read: Importance of Email Databases